4-mic Drum Recording
Bought a new interface with 4 inputs and want to put it to good use, especially on a drum kit? We’ve all heard that you can get very fancy with drum recording… Some engineers use 20+ mics on a kit for certain sessions. This is all great and wonderful if you have the knowledge, budget and time, but for the average beginner or intermediate musician or engineer, 4 microphones is more than enough. In this blog article we’ll share some insights, tricks and gear suggestions for recording your drum kit with exactly 4 mics.
🎤🎙🎤🎙
1 on Kick, 1 on Snare, 2 Overheads
This type of 4-mic drum recording is the standard, go-to method when you have 4 input channels available on your audio interface: one mic on the kick (or bass) drum, one on the snare drum and two overhead mics above the drum kit.
-

- Roland Rubix44
-

- Universal Audio Volt 476P
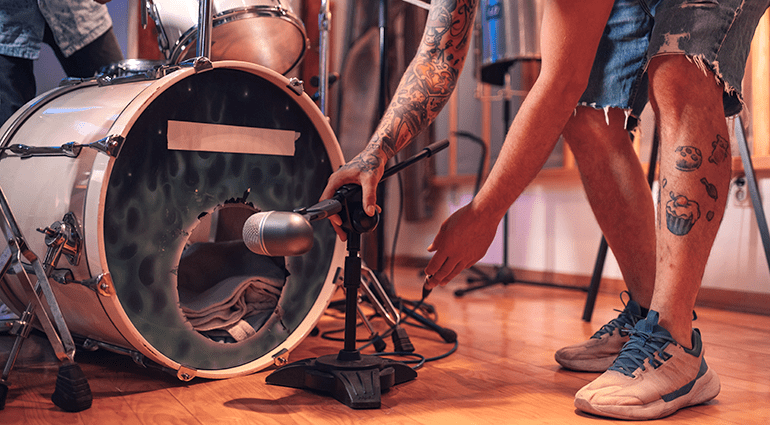
You can start by placing a kick-drum mic (dynamic or condenser) in front (or inside the drumhead hole) of the kick drum. Experiment with positioning here and use pillows and/or blankets inside the drum to dampen the sound if desired. The sound depends on your personal preference, whether you like it big and boomy or tight and muted.
-

- the t.bone BD 300
-

- Shure SM57 LC
-

- DPA 4055 Kick-Drum Mic
Next, you will need a dynamic mic on the snare drum. Try the classic Shure SM57 (pictured above), a Sennheiser MD421-II or something fancier like the Telefunken M80 Standard (pictured below). Position its capsule above the rim of the drum and facing towards the middle of the drum skin’s surface. Play around with the positioning until you have the desired sound. You can place the mic’s capsule just above the drum’s rim or higher. You can also place the mic closer to the center of the snare drum’s skin or further away. Experiment and notice how it affects the tone and the presence of overtones!
-

- Sennheiser MD421-II
-

- Telefunken M80 Standard
Then you will need two overhead mics positioned above the drum kit and facing down. This could also be one mic, but if you want to have some mixing versatility in the stereo field, two mics are recommended. If you’re on a tight budget, we recommend the t.bone SC 140 Stereo Set which comes with a shock mount, wind shields, stereo bar and a sturdy carrying case. A great option for a medium-budget mic, or rather, a pair of these, would be the AKG C 451 B. A more expensive option would be the Neumann KM184 mt Stereo Set. Another option would be to use one stereo mic, which in essence is like using two mics because there are two capsules perpendicular to one another (at precisely 90 degrees). This is called the X-Y technique. A great option for this is the Rode NT4.
-

- the t.bone SC 140 Stereo Set
-

- Neumann KM184 mt Stereo Set
-
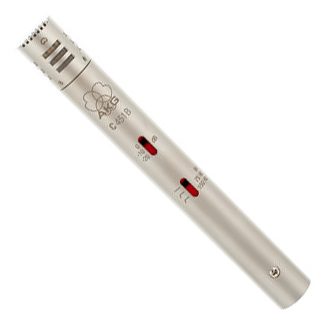
- AKG C 451 B
-

- Rode NT4
Overhead mic configurations for a 4-mic drum recording
These are some common tried-tested-and-true methods of recording in stereo with two overhead mics:
A-B technique: two parallel microphones, typically omnidirectional, some distance apart, capturing a wide stereo sound. One can be placed roughly above the ride cymbal and the other above the snare drum, as an example. But adjust them as needed! Caution: This technique can produce phase issues when the stereo signal is later mixed to mono.

A-B technique (Public Domain)
X-Y technique: two directional mics at the same place, and typically placed at 90° or more to each other. Generally produces a less “spacey” stereo sound and has less depth compared to recordings employing an AB setup. You should normally be able to avoid phasing issues with this technique.

X-Y technique (CC BY-SA 3.0)
ORTF technique (also known as side-other-side): two cardioid microphones (identical or very similar ones) spread to a 110° angle, and their capsules spaced 17 cm apart. This technique tends to add a bit more body to the drum sound. Try it out and see how it sounds in your room with your kit!

ORTF technique (CC BY-SA 3.0)
In the video below, Simon describes, more in detail, how mic positioning affects the sound. You can also hear some illustrated examples of the overhead mic configurations mentioned above. 👂
You are currently viewing a placeholder content from Youtube. To access the actual content, click the button below. Please note that doing so will share data with third-party providers.
Glyn Johns 4-mic drum recording technique
Another way to record your drums with four mics is the so-called Glyn Johns technique. It’s not that different than the one mentioned above, especially regarding the kick drum and snare mics (the snare mic is actually optional). Where it differs is in the “overhead” mic position. Instead of placing both mics over the drum kit, you place one about 120 cm above the snare drum and the other about 15cm over the rim of the floor tom, pointed at the snare. Both of these mics should be about the same distance from the snare.
You’ll be surprised at what a big drum sound you get. In the video below, Glyn Johns himself explains how simple the technique is and how measuring the mic distances is, from his experience, unnecessary! The man has worked with some of the most iconic rock groups in history, so let’s take his word for it!
You are currently viewing a placeholder content from Youtube. To access the actual content, click the button below. Please note that doing so will share data with third-party providers.
Conclusion
Have you tried any of the drum recording methods we mentioned above? Or maybe you have your own variation? Let us know the details in the comments!


One comment
Leave a Reply
You are currently viewing a placeholder content from Facebook. To access the actual content, click the button below. Please note that doing so will share data with third-party providers.
More InformationYou are currently viewing a placeholder content from Instagram. To access the actual content, click the button below. Please note that doing so will share data with third-party providers.
More InformationYou are currently viewing a placeholder content from X. To access the actual content, click the button below. Please note that doing so will share data with third-party providers.
More Information
andrewpurcellmusic says:
I ve done it with three , condenser in front of the bass drum, 2 side mics pointing down wards. came out ok