Podcasting and streaming 101 | Beginner setup for streamers and gamers
Putting together a setup for audio streaming isn’t as difficult as it seems. No matter if you’re looking for a setup for a podcast or vlog that features on-site or remote interview guests, for streaming songs as a musician, or for sharing tutorials and playthroughs as a gamer: Read this blog post to find out what you should look out for when putting together your audio streaming setup. 💥
Your streaming hub: the audio interface
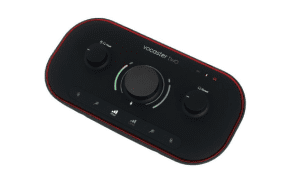
The audio interface is the central hub of your streaming setup. That’s why it’ll make several appearances in this blog article. If you want flexibility and a good sound, choose an interface that provides not just one but several microphone inputs. It should also offer studio-quality sound, i.e. a resolution of at least 24 bit and 48 kHz. To be able to sufficiently boost microphone signals while keeping the noise level low, it doesn’t hurt if the interface offers preamps that provide more than 50 dB of gain. In addition to these basics, look for features that simplify your streaming workflow. For example, some interfaces have illuminated controls that are easy to operate even in a dimly lit gaming room. If you have limited space, the audio interface should be as compact as possible and have non-slip feet so it doesn’t slide around on your desk. The single-channel audio interface Focusrite Vocaster One and its two-channel sibling Vocaster Two offer all of these features.

Focusrite Vocaster One
Focusrite Vocaster Two
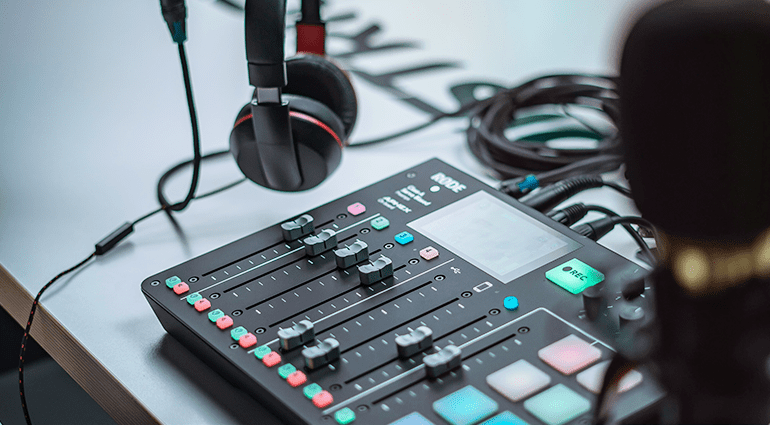
A particularly convenient – but also more expensive – solution is to choose a streaming interface that includes a mixer and multifunctional pads, such as the Rode Rodecaster Duo or the Roland Bridge Cast X, which is also suitable for video streaming.

Rode Rodecaster Duo

Roland Bridge Cast X
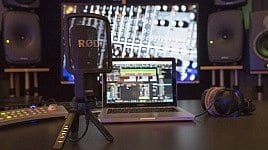
Your voice matters: pick the right microphone
To pick up your voice while streaming, you need a microphone. A condenser mic that delivers a highly detailed sound, such as the Rode NT1, can be just as suitable as a dynamic mic that offers a classic broadcast sound, such as the Shure SM7B.

Shure SM 7 B
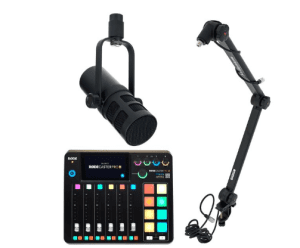
To ensure good microphone positioning while keeping your hands free for notes or a game controller, you can use a desktop stand or, even better, a microphone arm. If you don’t have a microphone yet, a microphone and arm bundle, such as the the t.bone MB 7 Beta Stand Bundle, is a great solution.

the t.bone MB 7 Beta Stand Bundle
You should mute your microphone during pauses or when you need to clear your throat. This is more pleasant for your listeners and saves you the hassle of editing out unwanted sounds if you pre-record your stream. If your microphone does not have a mute function, you can opt for an audio interface with a mute button. It’s also a plus if the interface not only has a level meter for its microphone inputs but also an auto-gain feature like the Focusrite Vocaster interfaces. This makes it easy to adjust the microphone levels for your guests or when changing microphones.
Focusrite Vocaster Two
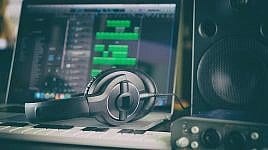
Monitoring: headphones or headset
Of course, you need to be able to hear your own voice while streaming, but also music, interview partners, or game audio. Circumaural closed-back monitor headphones, such as the the t.bone HD 200, the AKG K-182, or the beyerdynamic DT-770 Pro 80 Ohm are a good choice. They have the advantage that they help to prevent feedback. If you use monitor speakers instead, their sound can be picked up by the microphone, which causes feedback issues.

the t.bone HD 200

beyerdynamic DT-770 PRO/80 Ohm
If you’re looking for an extra-compact audio streaming solution, you can opt for a headset that combines closed-back headphones and a microphone in one device. The advantage of a headset is that the distance between the microphone and your mouth remains constant. This means that the volume and sound of your voice is consistent even when you move your head. Make sure that the microphone and headphone plugs of the headset match the inputs and outputs of your audio interface or that adapters are included with the headset. This is the case with the Audio-Technica ATH-M50xSTS XLR and the Rode NTH-100M for example.
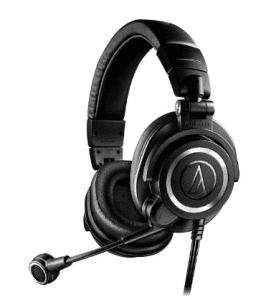
Audio-Technica ATH-M50xSTS XLR
Rode NTH-100M
Quick setup – presets and bundles
If you’re a beginner, you’ll probably prefer a solution that allows you to set up your microphone quickly and easily without the need for time-consuming fine-tuning in a DAW. In this case, choose an audio interface that offers software-controlled presets for processing your vocal sound. This is the case with the Focusrite Vocaster models for example. They allow you to select presets in the software which you can then apply independently to the two microphone channels at the touch of a button on the audio interface.
If you don’t yet own any streaming equipment, putting together your setup will be much easier if you go for a complete bundle. For example, you can find the Rode Rodecaster Pro II Mic Bundle1 in the Thomann shop. We also offer the Focusrite Vocaster One Studio and the Focusrite Vocaster Two Studio – single-channel or dual-channel bundles that include the aforementioned Focusrite streaming interfaces as well as closed-back headphones and a microphone.
Rode Rodecaster Pro II Mic Bundle1

Focusrite Vocaster One Studio
Additional features for easy streaming
If you’re looking for a smooth streaming workflow without a lot of effort, features like mix-minus and loopback can make your life a lot easier. If your stream includes an interview partner joining remotely over the internet or phone, the time lag between transmissions can become a problem. This latency can lead to the guest hearing their own voice with a delay, which makes talking very difficult. To avoid this problem, you can use an audio interface with a mix-minus feature. It ensures that your guest hears the monitor mix without the signal from their own microphone. This allows them to speak freely without interrupting themselves.

IK Multimedia iRig ProQuattro I/O
Another helpful feature is the loopback function. As a gaming streamer, you need to be able to listen to the game audio on your headphones while simultaneously transmitting it over the internet. If you don’t have an external mixing desk, this can be quite complicated. This is where the loopback feature can save the day. It allows you to process the game sound latency-free in the computer while mixing it with the signals from your microphones. To do this, simply assign the audio output of a game to a virtual loopback input. Dedicated streaming interfaces such as the IK Multimedia iRig Pro Quattro I/O, the Mackie M-Caster Studio, or the Focusrite Vocaster models offer a loopback function. With their convenient workflow, they’re the perfect centerpiece of your audio streaming setup.

Mackie M-Caster Studio
Feedback: Streaming
What are your experiences with streaming equipment? Do you prefer near-field monitors to closed-back headphones for audio streaming, or do you have any other helpful tips for audio and game streaming? Let us know in the comments.


You are currently viewing a placeholder content from Facebook. To access the actual content, click the button below. Please note that doing so will share data with third-party providers.
More InformationYou are currently viewing a placeholder content from Instagram. To access the actual content, click the button below. Please note that doing so will share data with third-party providers.
More InformationYou are currently viewing a placeholder content from X. To access the actual content, click the button below. Please note that doing so will share data with third-party providers.
More Information