Acoustic Tips for your home studio
High-quality loudspeakers on the Producer desk or expensive instruments and a good little PA in the rehearsal room – all this is no guarantee for a good sound. Of course, if music can be properly recorded and mixed where it is produced, it is great and desirable, but the prerequisite for this is a perfect acoustic response from the room. And it’s no surprise that, when it comes down to your budget for building a professional recording studio, the acoustic treatment represents a large percentage of your total budget.
Premise
Obviously, not everything is so expensive. Sure, to correctly and permanently treat a room, you should expect to pay a considerable amount of money. But to fix certain problems, avoid too many bass frequencies flying around or simply improve the overall sound of your recording studio, solutions may be much cheaper than you think.
Before you deal with the use of room acoustics modules or the like, you should ensure that the basic requirements are fulfilled. Even the best speakers have to be put in the right position! So pay attention to the general rules provided in the manufacturer’s instructions. This alone can be a significant leap towards a great sound! You can do the same thing in the practice room: just change the positions of amps and the drum kit – you will learn a lot about your instruments, your room and the acoustics in general.
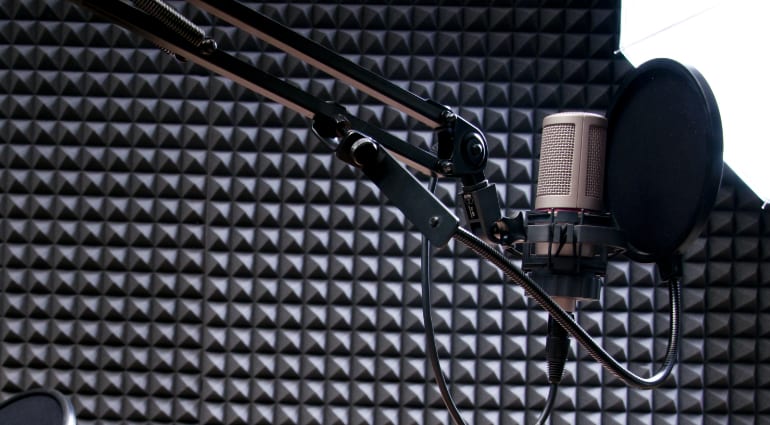
Acoustic problems can be obnoxious. In normal living rooms and basements, you will immediately notice that, due to the walls being parallel to each other, the sound is reflected in an undesirable way. For example, a sound generated by a loudspeaker may have a tonally altered sound if it reaches the listener a little later via the detour of a wall. In the worst cases, you can clearly hear a “phasing” effect.
The more “sound-proof” a material is, the more it reflects. Glass, tiles or exposed concrete reflect more strongly, especially vertically, than say, a velvet curtain. This is because open structures withdraw energy from the sound, which “moves” through moving air molecules, and thereby dampens it. This process is called “absorption.”
Absorbers
And this principle is also taken advantage of: absorbers are elements that are made for exactly this purpose. They are available as practical tiles, even in visually attractive designs, for relatively little money. Everyone knows the legendary grey foam, but because the eye shall be pleased as well in this world, many will opt for models that not only fulfill a purpose, but also look great. And the t.akustik Hihgline A2 Teak surely looks legit!

-
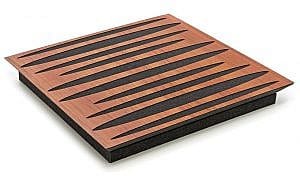
- t.akustik Highline A2 Teak

Diffusors
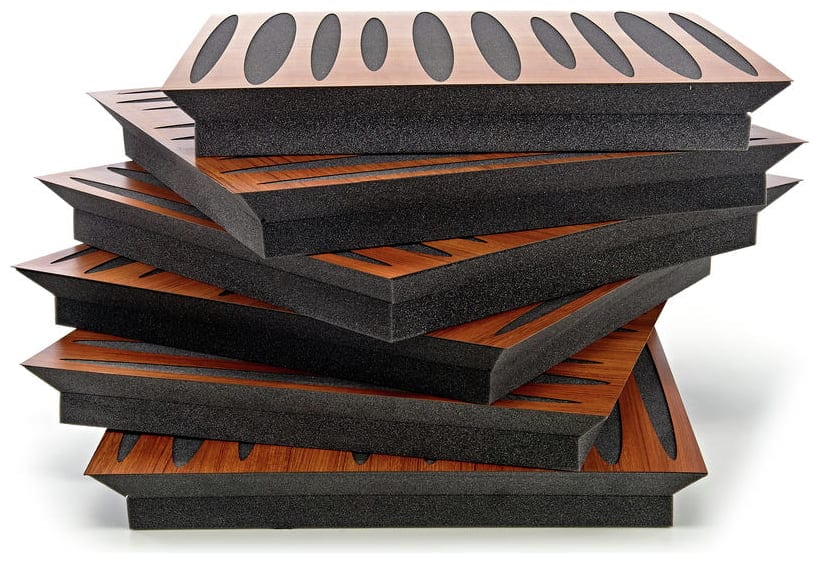
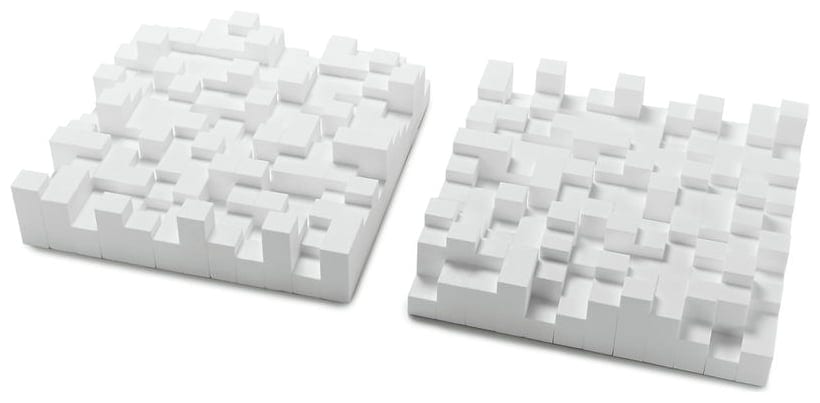
While you can definitely overdo it with absorbing, you should never completely “kill” the room. In the rehearsal room the finest cymbals may sound slack and dull, while studio mixes may sound too high-pitched because typical listening room reflections are missing. Often it is better not only to transmit the sound from the source directly towards one point, but instead to distribute a part of it evenly in different directions. This method is called diffusion, and the element that does just this is the diffuser. There are very different versions, but you should note the following: Some diffuse in one dimension (usually parallel to the floor on the listening plane), others diffuse two-dimensionally.
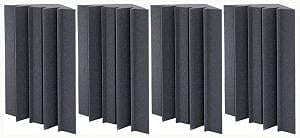
These two-dimensional representatives often look very interesting as well – which doesn’t sound bad if you want to create a professional-looking production environment. For example, this t.akustik diffuser consists of hardened EPS foam capable of distributing the sound very effectively, while also making every studio wall an eye-catcher.

-

- t.akustik Diffusor Manhattan EPS

Bass Traps and complete sets
Normal absorbers prevent unwanted reflections quite well, but would have to be very, very large for low frequencies. That means they basically only muffle the highs and mids. For attenuation a little further down in the frequency spectrum, special film resonators like this EQ Acoustic Spectrum Trap bass absorber can be used quite effectively.
Bass traps are usually placed in room corners, because that’s where the bass has the most energy. And to deal with enormous spatial problems such as a strong emphasis on a particular area or a “hole”, either very special solutions must be found or electronic tricks are required, (just google “electronic space correction” 😉 ).
-

- EQ Acoustics Project Corner Traps blue

-
- Auralex Acoustics Lenrd Bass Traps Charcoal 4

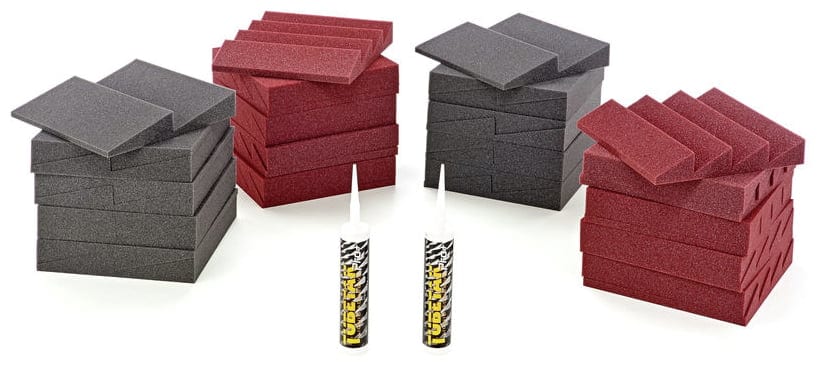
Speaking of bass: None of the mentioned acoustic modules will significantly change the sound emission to the outside! Only acoustic equipment or cabins can help here, combined with sound sources, isolation systems, good tripods, or decoupling via a Noise Elimination Podium can be an effective solution. For the acoustic optimization of a room there are complete packages, such as the super equipped and overall-great “Akustikset Mega” package. Obviously, you can buy less expensive and smaller packages, such as the t.akustik Room Set 1 and the Auralex Acoustics Roominators D-36 DST Burgundy.
-
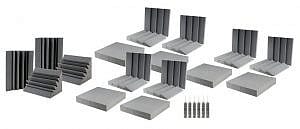
- the t.akustik Room Set 1

-

- Auralex Acoustics Roominators D 36-DST Burgundy
Different options for different spaces
Here’s a comprehensive list of typical “to-be-expected” problems and how to fix them – and a few quick tips:
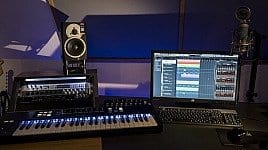
Control Room / Producer Station
– Medium sized absorber on the front wall between the speakers
– Absorber on the side walls on the “shortest sound detour” from speaker to listener, the sound can go over the wall or ceiling. This is usually halfway between the speakers and the listening position.
– Diffuser or absorber on the ceiling at the same height
– Diffuser on the back wall
– Bass traps in all four corners of the room, ideally from floor to ceiling
Rehearsal / Live Room
– Absorb and diffuse bare walls, but if possible leave them over 20% reflective so that the room does not become “dead”
– Avoid parallel bare walls to prevent flutter echoes, allow little symmetry in the room
– Distribute absorbers on the ceiling as well
– Walls and ceilings not consistently free, absorbent or diffusing, but for recording purposes, choose acoustic elements that are flexible and movable
The acoustic of a room is a very delicate and complex topic – we either chase the perfect room sound or the most effective isolation for our needs – but don’t worry: starting off is not as hard as it sounds, and it’s also a lot of fun!
And now: why don’t you show us YOUR home studio?


2 comments
Leave a Reply
You are currently viewing a placeholder content from Facebook. To access the actual content, click the button below. Please note that doing so will share data with third-party providers.
More InformationYou are currently viewing a placeholder content from Instagram. To access the actual content, click the button below. Please note that doing so will share data with third-party providers.
More InformationYou are currently viewing a placeholder content from X. To access the actual content, click the button below. Please note that doing so will share data with third-party providers.
More Information
Nigel Matthews says:
Very good article ??
Martin says:
Great tips, Simon!
In my experiences, the most basic things you can do, in order of importance:
-Bass traps in the corners
-Absorption on the reflection points on the side walls
-An acoustic cloud above you
-Absorption behind the speakers in the middle
-Diffusion on the back wall behind you
I’ve written couple articles sharing some tips that I’ve learned throughout the years on my blog:
https://gadgetspage.com/