


TP
Affordable and effective patching!
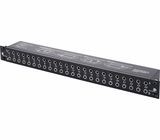
If you want to take control of the cable spaghetti invading your studio, a patchbay is the answer; and with bantam units costing too much for the casual muso, these quarter-inch jack units come into their own. I have four now, arranged as one big bay three deep and a subsidiary bay on the other side of the room to handle effects sends and returns.
The units come "semi-normalised", which means that a connection made at the top of the rear panel automatically feeds down to the connection made at the bottom of the rear panel even if no patch cord is inserted in the front to link them. This is handy if you have a bunch of connections that, typically, stay the same: you can link the stereo outputs of your main keyboard, say, to inputs 1 and 2 on your audio interface in a semi-permanent fashion. Sticking a patch cord into the front sockets on a semi-normalled connection breaks the link, though, allowing you to overrride your usual setup whenever you like: and this is how I've got most of my studio arranged.
There are some connections, though, where it's better to have things totally variable, without any normalisation; and the bay allows you to set this up by unscrewing its front panel and reversing some or all of the little individual socket cards. By reinstalling them in various different configurations you can have normalled or semi-normalled functionality, or even use them as Y-splitters (what you'd call Mults in modular-synth-speak), and this can be decided on a card-by-card basis across the whole 24 pairs of sockets. Once you've got your head around the possibilities it's very flexible indeed, though a bit of a faff to replace the front panel when you're done because the little cards end up reluctant to align with the punched holes in the panel strip. But you'll get there in the end. There's a handy guide to the various configuration options silkscreened onto the top of the unit, too, which is a bit of a lifesaver if all this normalled / semi-normalled stuff is unfamiliar territory (as it was to me...)
In all ? hugely useful in taming my studio cabling, and versatile enough to accommodate lots of routing options.
14
3
Report
A
Excellent Patchbay for the price
This is an excellent, cheap patchbay that has stopped me from having to get a torch and fiddle with a mess of wires at the back of my rack everytime I want to change the routing. However, there are few difficulties with this unit...
Although it comes pre-assembled, the earthing clips come in a separate bag so if you want your connectors earthed, you have to take the unit apart (meaning you have to unplug everything first), insert the clips in the right place, then re-align every connector so that you can get the covers back on and screw it all back together.
Each strip is set to 'half normalled' so if you want any set to 'thru', again you have to unplug everthing, take the unit apart, flip the circuit board around and then re-align everything again to get it closed.
It comes with lots of sticky strips to write on to label your routing, but this proved too small for me to write legibly on once I eventually found a pen that wrote on the plastic coated paper. Printing some labels from my computer seemed easier and a lot better solution.
Desipte these difficulties, once set up it will leave you thinking how you managed before without it. Just make sure you have enough cables to connect everything!
?
4
0
Report
e
Sturdy
I have had this patchbay in my studio for several years now and it still works well. The connectors are a bit hard to use, but they are durable and have held up well over time. In this price range, I think it is the best you can buy. Overall, I am satisfied with my purchase.
0
0
Report
B
Does what it should, very well.
Gets the job done, you can configure it to your liking, great value for money. Definitely the go-to trs patchbay for me.
0
0
Report
SP
Solid piece of gear!
Does exactly what it’s supposed to do. You simply can’t go wrong with this unit. I own several of these and can say they definitely serve their purpose!
0
0
Report
i
The end to cable mess
Enough of reconnecting half of the studio every time I need a change. Patch bay is convenient way to reorganise your signal path as needed.
Good quality build, Neutrik ports are pretty solid.
Good quality build, Neutrik ports are pretty solid.
0
0
Report
D
Zeer goed voor dat beetje geld
Net wat ik zocht, doet wat verwacht wordt!
0
0
Report
S
Perfect if you don't use it a lot
This is perfect for a "non-intense" use, versatile and good looking
0
0
Report
B
Simple, cheap and does the job
Absolutely no problems with this patch bay. It is completely modular, so even if some of the channels fail, which is unlikely, you could buy single channel modules to replace them. Great device for the money!
0
0
Report
Kt
Excellent patchbay, versatile and great connectivity
0
0
Report